
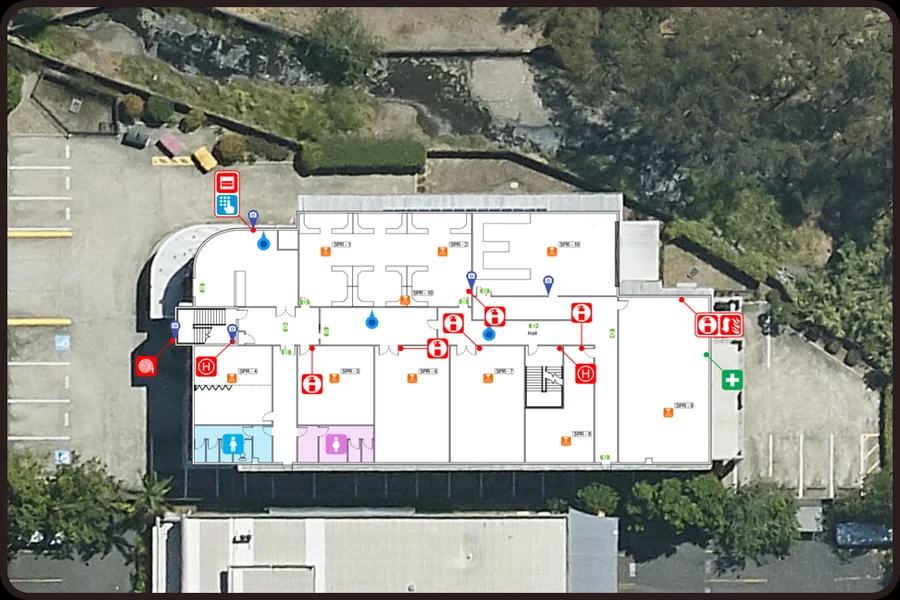
Evacuation Diagrams: Correcting Disorienting Floor Plan Alignments to Ensure Immediate Situational Awareness
Picture yourself standing in an unfamiliar corridor as the evacuation alarm sounds. You glance at the diagram on the wall, find the red “You are here” dot and the green exit symbol, then turn left. Twenty metres later you hit a dead end. The diagram was drawn the wrong way around.
It happens more often than you might think. Many evacuation diagrams are copied straight from architectural plans with north at the top, then mounted on walls facing every direction. The result is a sign that technically shows the right information but sends people the wrong way. Let’s clear up some common myths about orientation and what good diagrams actually need.
Myth: A Standard Floor Plan Is Good Enough
Fact: A floor plan and an evacuation diagram serve different purposes. Architectural plans are drawn for builders and designers, usually with north pointing up the page. They don’t care where a person is standing when they read them.
Good evacuation diagrams are different. They’re read in seconds, often under stress, by people who may never have visited the building before. Australian Standard AS 3745 requires diagrams to be correctly oriented with respect to their location. In plain terms, what’s in front of you on the wall should be in front of you on the diagram, and what’s on your left should be on the left.
Myth: People Will Work It Out
Fact: In an emergency, most people don’t have the time or calm to mentally rotate a map. Stress narrows attention and slows complex thinking. A visitor, contractor or new employee who sees an exit on the left side of the diagram will usually turn left.
That’s why orientation matters so much. A correctly aligned diagram lets people take one glance, understand where they are and move. A misaligned one forces them to stop and puzzle it out, or worse, sends them toward a dead end or into the hazard.
Myth: One Diagram Can Be Copied Across the Whole Floor
Fact: Every diagram location needs its own version. If one diagram is mounted near the lifts facing north and another near the kitchen facing east, they need different orientations, even though they show the same floor.
This is where many workplaces go wrong. They print a dozen copies of one diagram and hang them everywhere. Each diagram should be rotated to suit the wall it’s on, with the “You are here” marker placed exactly where the reader stands.
A practical check is simple. Stand in front of the diagram, look at the nearest door or corridor, and confirm it appears in the same position on the plan. If it doesn’t, the diagram needs fixing.
The same goes for the routes themselves. Each diagram should show the nearest exit from that exact spot, along with an alternative route in case the first is blocked. Those routes need to match your fire evacuation plan, so wardens and staff are all working from the same instructions.
Multi-level buildings add another layer. Diagrams near stairwells should make it obvious which stairs lead outside and which floor people will exit on, since ground levels on sloping sites aren’t always where visitors expect.
Myth: Orientation Is the Only Thing That Matters
Fact: Orientation is critical, but a diagram also needs the right content and clear presentation. AS 3745 sets out the elements a compliant diagram should include, such as the “You are here” location, designated exits, the location of fire equipment like extinguishers, hose reels and alarm call points, the assembly area, a legend and the date the diagram was validated.
Clarity matters too. Keep the drawing simple, remove unnecessary architectural detail like furniture and wall thicknesses, and make sure exit routes stand out. Diagrams should be large enough to read easily, mounted at eye level and placed where people naturally pass, such as near lifts, stairwells and main corridors.
Your diagrams should also match your wider emergency procedures. If your procedures send a floor to a particular assembly area or stairwell, the diagrams on that floor need to show the same thing. Mismatches between the two cause confusion during drills and real events.
Myth: Once They’re Up, They’re Done
Fact: Buildings change. Walls move during fit-outs, doors are relocated, new partitions block old routes and fire equipment shifts. Each change can make an existing diagram wrong.
Review diagrams whenever the layout changes and at regular intervals. AS 3745 calls for diagrams to be reviewed at least every five years, but any significant change to the floor layout should trigger an immediate update. Check the validation date on each diagram during routine inspections.
Evacuation drills are another good test. Watch how people use the diagrams. If staff hesitate, turn the wrong way or ignore the signs, something needs improving. Ask a few visitors or new starters to find the nearest exit using only the diagram. Their reactions will show you quickly whether the orientation and layout make sense to someone unfamiliar with the building.
Fixing Misaligned Diagrams
If you discover diagrams that are oriented incorrectly, the fix is usually straightforward.
Start by mapping every diagram location on each floor and noting which direction each wall faces. Then have each diagram redrawn or rotated to suit its position, with an accurate “You are here” marker. Remove old diagrams as new ones go up, so outdated versions don’t linger.
Involve your wardens in the review. They know the floor, they know where people tend to get confused and they’ll be the ones guiding others in an emergency.
First 5 Minutes is one Australian provider that prepares evacuation diagrams and emergency plans, including site checks to make sure each diagram is aligned to where it’s mounted.
A Quick Glance Should Be Enough
The best evacuation diagram is one that nobody has to think about. A person should be able to look at it, recognise where they’re standing and know which way to go, all within a few seconds. Correct orientation is the foundation of that. Check every diagram in your building with that simple test: stand in front of it, look around and make sure the plan matches what you see.