From First Delivery to Final Cleanup: Construction Site Waste and Spill Readiness Plan
Table of Contents
- Why Readiness Matters on a Busy Job Site
- Build a Plan Before Work Begins
- Map Waste Streams and Storage Areas
- Reduce Spill Risks During Daily Work
- Use a Clear Spill Response Sequence
- Give Workers Clear Roles and Training
- Track Inspections, Waste, and Corrective Actions
- Adjust the Plan for Weather and Site Changes
- Avoid Common Planning Mistakes
- Final Takeaway
Construction site readiness starts long before the first dumpster, fuel delivery, or pallet of materials arrives. A practical plan helps crews handle everyday waste, prevent releases, and react safely when conditions change. Teams looking for support with site-specific environmental planning can review https://www.sitelineservices.com/environmental-solutions as they build procedures that fit the work ahead.
The best plans are simple enough to use during a busy shift. They identify what will be brought onto the site, where it belongs, who is responsible for inspections, and what workers should do if a container leaks or a vehicle damages a hose. That clarity can reduce confusion, protect workers, and keep materials out of drains, soil, and nearby waterways.
Why Readiness Matters on a Busy Job Site
Waste and spill planning belongs in preconstruction because site layout, delivery routes, drainage, and storage locations influence what can go wrong later. A leaking drum placed beside a storm drain, an overflowing trash container, or a misplaced spill kit can create avoidable work for the entire crew.
Readiness also means recognizing the limits of an on-site response. An incidental release may be manageable by trained workers with appropriate protective equipment and supplies. An unknown, uncontrolled, or potentially dangerous release requires isolation and escalation. OSHA explains that hazardous-substance releases can create serious worker risks and that hazardous-waste emergency response requirements apply to certain operations and emergency situations.
Build a Plan Before Work Begins
A useful readiness plan does not need to be lengthy, but it should be specific. Walk the site before operations begin and identify the materials, activities, and locations most likely to create waste or cause a release.
Start with a material and contact list
- List expected fuels, oils, paints, coatings, solvents, adhesives, concrete materials, cleaners, and other site products.
- Identify where each material will be delivered, stored, used, and removed.
- Record the site supervisor, safety lead, waste coordinator, property contact, emergency services, and qualified cleanup contacts.
- Define who can address a minor release and when workers must stop work and call for specialized help.
Keep current product labels and safety data sheets accessible to the crews who use those materials. If a product changes, update the list and brief affected workers before use.
Map Waste Streams and Storage Areas
Separate waste where it is generated whenever practical. Mixing materials can make handling and disposal more difficult, while clear containers and designated collection points help workers make the right decision quickly.
- Use containers labeled for the material they are meant to hold.
- Keep incompatible materials apart and follow product instructions for storage.
- Place containers on stable ground, away from travel lanes, drains, waterways, and low areas that may collect runoff.
- Check lids, seams, supports, and container condition for leaks, corrosion, damage, or overfilling.
- Maintain clear access for collection vehicles and emergency equipment.
For each waste stream, document the material type, storage location, container style, inspection frequency, and planned disposal route. EPA’s national menu of construction stormwater practices describes controls for waste management, spill prevention, and storm drain protection.
Reduce Spill Risks During Daily Work
Small routines are often the most effective controls. Inspect hoses, valves, caps, and fittings before use. Refuel only in designated areas, keep container lids closed when not in use, and remove damaged containers from service promptly.
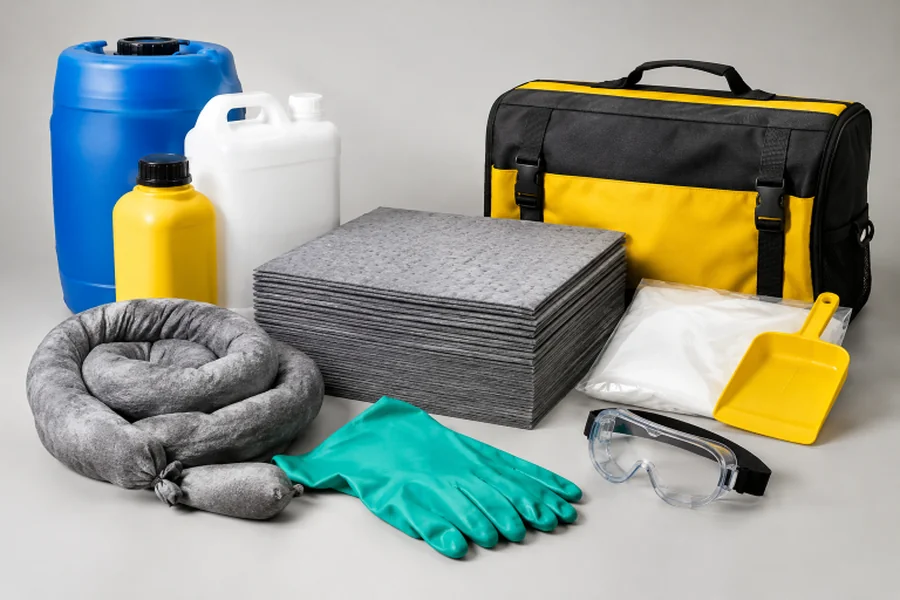
Place absorbent materials and drain protection close to likely spill points, such as fueling areas, equipment maintenance zones, and chemical storage locations. A spill kit is not useful if workers cannot find it, do not know how to use it, or fail to replace supplies after a cleanup.
Use a Clear Spill Response Sequence
Workers should have a short response sequence they can remember under pressure:
- Stop: Stop the source only when it can be done without creating additional danger.
- Warn: Keep people away and control access to the area.
- Protect: Use the required personal protective equipment.
- Contain: Keep material from reaching drains, soil, or surface water when it is safe to do so.
- Notify: Contact the designated supervisor and emergency contacts as required by the site plan.
- Recover: Collect, label, and store cleanup materials appropriately.
- Review: Record the event and correct the condition that caused it.
Never send workers into an unknown chemical release simply because it appears small. Identify the hazard first, consider wind and drainage paths, and bring in qualified assistance when the release exceeds the crew’s training, equipment, or authority.
Give Workers Clear Roles and Training
Role confusion slows a response. Every project should identify who can stop work, who contacts emergency services, who manages traffic or access, who retrieves supplies, and who documents the incident.
- Provide site-specific onboarding before workers begin.
- Include subcontractors in briefings and drills.
- Review procedures when crews, materials, work areas, or site conditions change.
- Practice likely scenarios, such as a damaged fuel line or overturned container.
- Teach workers how to read labels and locate safety data sheets.
Track Inspections, Waste, and Corrective Actions
Records turn recurring problems into visible patterns. Use daily checks for storage areas and containers, then note the material, location, quantity, observed condition, and action taken. Keep waste shipment records, training attendance, drill notes, photos, and corrective actions in an accessible system.
The goal is not paperwork for its own sake. Assigning one person and one completion date to each correction makes it more likely that damaged containers, missing labels, and depleted spill supplies are addressed before they become larger problems.
Adjust the Plan for Weather and Site Changes
A readiness plan should evolve as the project moves from grading to structural work, utilities, paving, and final cleanup. Before heavy rain or high winds, secure or move containers, confirm covers are intact, and inspect drainage controls. After storms, check berms, inlet protection, silt controls, and storage areas for damage or displacement.
Reassess the plan when excavation, temporary roads, deliveries, or expanded work zones change access routes. Seasonal cold and heat can also affect equipment, container condition, and worker protection needs.
Avoid Common Planning Mistakes
- Using one container for several waste types.
- Storing materials beside drains or in low areas.
- Keeping spill kits far from active work.
- Leaving subcontractors out of training.
- Ignoring small leaks because they seem manageable.
- Failing to inspect containers after weather events.
- Skipping the post-incident review.
Final Takeaway
Strong construction site readiness comes from repeatable actions: identify materials, assign responsibilities, separate waste, inspect storage, train every crew, and use a clear response path. When those practices are part of daily operations, teams are better prepared to manage routine waste and respond calmly when an unexpected spill occurs.